Monday, February 4, 2013

Homemade Chocolate Syrup & Vanilla Syrup


We made delicious homemade chocolate syrup again tonight. Big thanks to Jessica at One Sweet Appetite for the recipe.  The only thing I changed was the use of raw milk instead of whole milk.  I like the taste much more than syrup we get at the store, and the kids have no complaints.  I have to beg them to take it easy on it, so it last more than a few days.  Everyone loves the taste, and the list of ingredients just sounds better than what is on the back of the Hershey's syrup label.

Hershey's Syrup = High fructose corn syrup, corn syrup, water, cocoa, sugar, contains 2% or less of potassium sorbate (preservative), salt, mono- and diglycerides, xanthan gum, polysorbate 60, vanillin, artificial flavor.

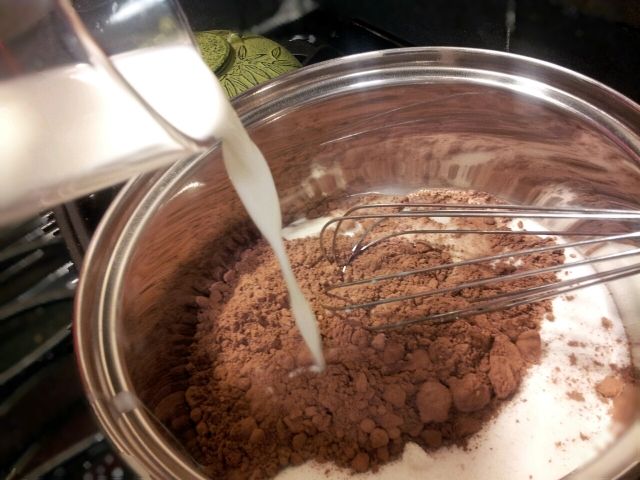
Homemade Chocolate Syrup = 1-2/3 cups sugar, 1 cup raw milk, 2/3 cup cocoa powder, 1 tsp pure vanilla extract.

The directions are simple, bring sugar, milk, and cocoa to a boil over medium heat, whisking until dissolved. Boil a minute or so longer.  Remove from heat and stir in the vanilla.  Let cool a bit and then pour into a container for storage in the refrigerator.

I have no idea how long this should last in the fridge, because around here it is gone pretty quickly.
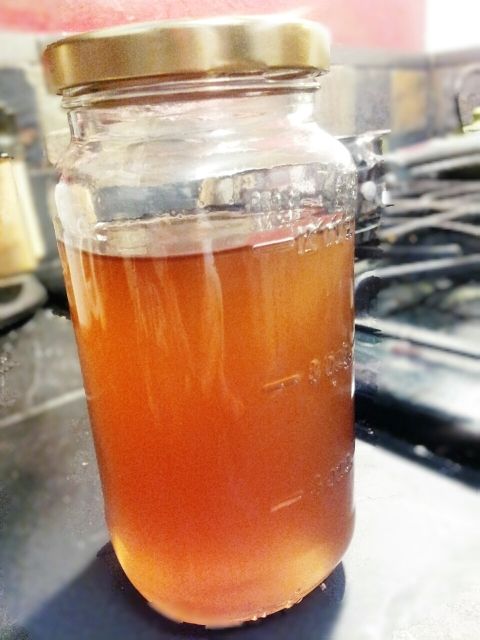

While I was waiting for the chocolate syrup to cool, I decided to try the vanilla coffee syrup recipe from Susan Bowers.  It is a little late for me to wait around for this one to cool tonight, so I'll have to try it in my coffee in the morning, but it was super easy to whip up.  I didn't follow the recipe exactly.  I wanted a much smaller batch to take to work with me.   Here is the recipe as modified. 

1 cup water
1 cup sugar
2 tablespoons vanilla extract.

Stir water and sugar over medium heat until sugar is dissolved.  Stir a few more minutes.  Remove from heat, and stir in the vanilla.

Now I didn't wash the chocolate off my whisk between recipes, so I'm hoping that a little of chocolate flavor seeps into my vanilla syrup.  If not, I may have to work on a new hybrid recipe.


Sunday, September 25, 2011

Indian Tacos

We have been studying the early Americans and Mesoamerica for American history the last week or so. It got me thinking about the delicious Indian tacos we had in Mesa Verde National Park during summer vacation, so this evening we made Indian tacos for the first time ever.

Making the topping is simple enough you don't really need a recipe. This is what we used: ground beef, Rotel Tomatoes, black beans, corn, chopped onions, taco seasoning, and a dash of chili powder.

We found a great fry bread recipe on AllRecipes.com. It was easiest enough also. Mix 2 cups of flour, 1 cup of milk, 1 tablespoon of baking soda, and a 1 teaspoon of salt together. Knead for five minutes. Let set for 5 minutes. Then fry.

If I had known how easy this recipe was I would have made Indian tacos sooner.

Tuesday, September 13, 2011

Using the SOS Client with Two Servers

One of the things I like about Switched on Schoolhouse is that the good folks at AOP were wise enough to create a client based system. This is great for allowing the kids to work on one computer while Mom grades work on another. Ideally Mom’s computer is set up as the server, and each child’s computer is set up as a client.

If you are like me, the problem with this is your kids are not always at home, and not always together when doing their schoolwork. This means that each child must have Switched on Schoolhouse independently installed on their own laptop computer. AOP apparently did not foresee this issue, because they did not create any option for switching between two different servers.

This is the work around that allows me to connect to both of my children’s computers. It is not difficult for those that are technically savvy. If you have manged to a client and a server together already, you can probably handle switching back and forth between two connections.

I only have 2010 installed, so I only know for sure this will work with 2010. However, it is very likely that it will also work with earlier versions.

1. Create a folder in your AOP folder for each child.

2. From the “Switched-On Schoolhouse 2010 Home” folder, make a copy of each of these files in each child’s folder: SOSHApp.exe.config and SOSHStudentApp.exe.config.
Make a new folder, and copy two new files for every computer you are trying to connect to, as well as a backup copy of the two files, in case you mess up.

3. Go to the first child's folder and open the SOSHApp.exe.config with Notepad.

4. Towards the bottom of the file you will find the line that looks like the line below. (With your server computer name in place of “COMPUTERNAME”.) If you have trouble finding the line just search for your server computer name.

5. Replace the computer name of the original server computer with the computer name of the computer you want to connect to, and save the file.

6. Now open SOSHStudentApp.exe.config with Notepad.

7. Towards the bottom you will find the line that looks like the line below. Again, if you can’t find it search for your server computer name.


8. Again, replace the computer name, and save the file.

9. To change the computer you are connecting to, copy and paste the two edited files into the original Switched on Schoolhouse folder. To change back to the original file, just copy and paste the backup files into the folder.

This works great for me. Just be sure to save your backups for each child into a separate folder, so that you don't accidentally override some one's work.

Tuesday, August 23, 2011

Monday, August 22, 2011

LiveBinders.com

New find! LiveBinders.com is a great place to keep track of online learning resources. It allows you to create a virtual binder, with tabs/pages. Each of the tabs can be linked to an web page. This is just an outstanding tool if you like to pull together lesson plans and units from multiple sources. Of course it is also a wonderful tool just to keep track of online resources. You can even use Google search to populate the tabs for you, and then add or delete tabs as you wish.

Below are the binders that I've started so far.


Typing Tutors


Chemistry Resources


Thursday, August 11, 2011

Cleaning Out the Closets

That time of year again! Time for the end of summer garage sale. Every year, on the Saturday after Labor Day, the neighbors on our street have simultanious garage sales. It is great, because it doesn't require a lot of advertising.

I don't think we participated last year, and I know I didn't really get rid of a lot of clothing, because I wasn't quite sure I was ready to get rid of my larger size clothing. I had been dieting for nearly a year, and was trying to level out my weight. Everyone always talks about how fast you gain back the weight that you lose. I went slow and steady in my diet to avoid that, but I was still afraid of throwing out my larger sizes.

One year later, I have 23 pairs of jeans in my new size, plus all of my old clothing in storage. I haven't even looked at the kids closets; although, they were working on them all evening on their own.

So here are a few rules that I've gathered for cleaning out the closet. I wonder how many I can stick with.

First, get rid of the obvious, get rid of anything you just really don't like anymore, or you know no longer fits. Set it aside for garage sale.

Second, get rid of everything with stains or holes. If it has either, get rid of it. Trash these, don't set aside for garage sale. This one is particulary hard for me, because I'm always wanting to save the fabric for something else: quilts, doll clothes, craft projects etc.

Third, try everything on. Unless you've worn it recently, try it on. This is the part the kids hate. I think they get rid of stuff that does fit, just becasue they are sick of trying things on. If it doesn't fit get rid of it. If you don't like the way it looks on, get rid of it.

That covers the basics, and my closet is slightly cleaner, but I still dont' have enough space. I'll need to dig a little deeper.

I've read that you need to limit yourself to four pairs of jeans and four pairs of black pants. I'm not sure how I could ever get it down that far, and I'm not sure I want to. If I only have four pairs of jeans, what am I suppose to wear on a one week vacation? I don't want to laundry while I'm on vacation. I'm still trying to talk myself into a reasonable number, but for now I've decided on fourteen. That is if I can pick my fourteen favorite pairs.

I've also read that if an item doesn't go with atleast three different items, get rid of it. I'll have to work myself up to that one I think.

Lastly I've heard about a process where you go straight the closet day by day. Each day you go the next item in line, and either wear it or toss it. I'm not as decisive as that, so I'm going to compromise. I'm going to allow each item three passes. I'll mark each pass with a rubber band on the hanger. Once I get three rubber bands I'll toss. I'll also need to make sure each item is arranged by season and purpose. After all I'm not going to go grocery shopping on Saturday in a suit, or wear my cargo pants to work. Oh wait, I do both of those all the time, but you get the idea.

Wish me luck.

Saturday, August 6, 2011

120 Great History Projects


I found an absolutely wonderful source for hands on history projects today at the library, 120 Great History Projects from Lorenz Books. This is definitely one of those I will have to go out and buy. It is jammed packed with art projects, costumes and recipes. I've just begun to dig into this book, but it looks like there is a hands on project to coincide with every just about era in history and prehistory.

Some of the recipes included in the book: "Stone Age Food", "Egyptian Pastries", "Aztec Tortillas", "Cowboy Cookout", and "Medieval Flan".

A sampling of the other projects include: Archimedes' Screw, a Viking coin and die, an Arctic sled, Japanese Samaria helmet, and a Celtic harp, just to name a very few.

Each project begins with a brief history lesson, a paragraph or two. Most include color illustrations to go along with the lesson. The lesson is followed by full color photos and step by step instructions for the project.

This is just an awesome book for homeschool project ideas!